

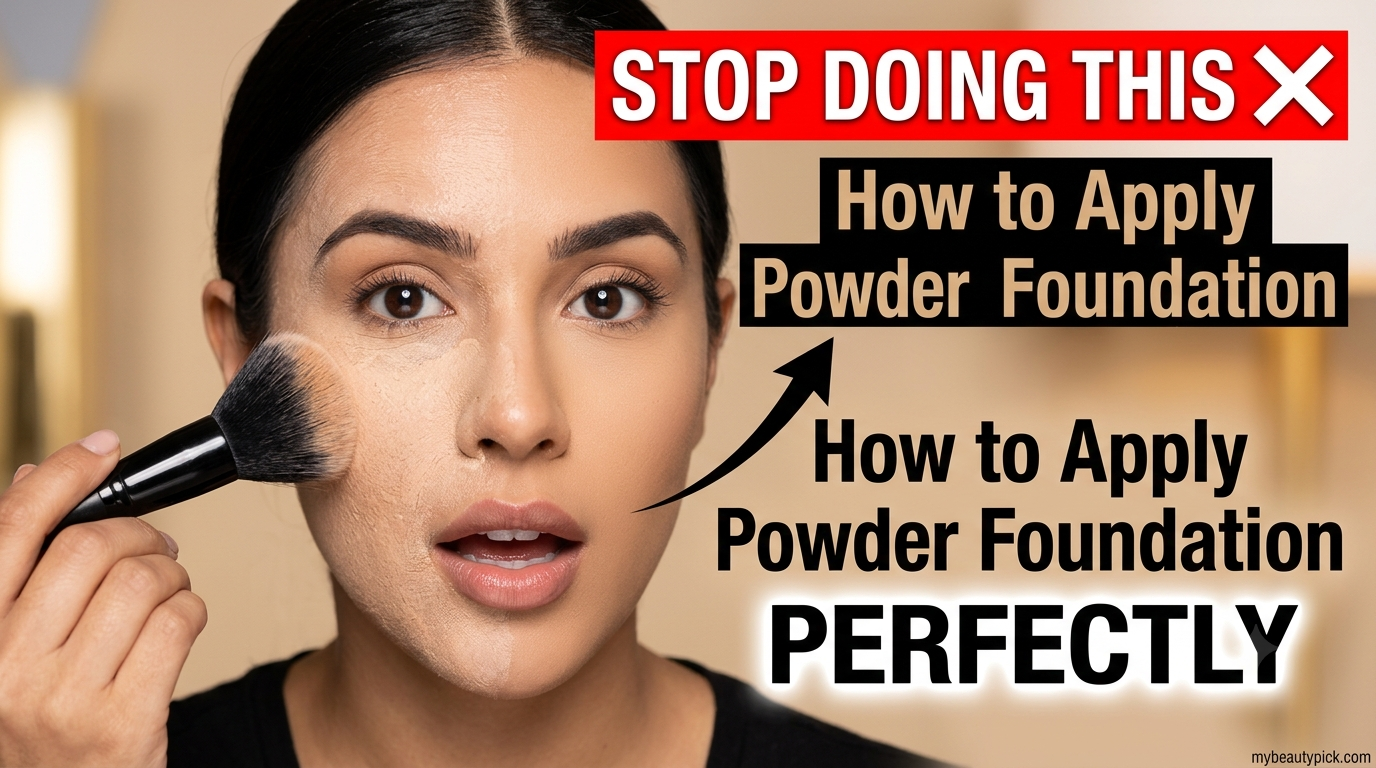
Powder foundation gets a reputation it doesn’t deserve. Most people try it once, end up with a patchy, chalky, or cakey result, and conclude it “doesn’t work for their skin.” What they’re actually experiencing is a technique problem, not a product problem. Powder foundation is genuinely less forgiving than liquid — it doesn’t self-level, it doesn’t blend out on contact, and it reacts to dry patches and excess oil differently than any liquid formula. But once you understand how it actually behaves on skin, applying it perfectly becomes straightforward and fast.
The core issue is this: most people apply powder foundation the same way they apply liquid foundation. They load a brush, sweep broadly, and hope for the best. Powder doesn’t respond to that. It responds to controlled deposition — small, deliberate movements that place product in thin, even layers, building coverage gradually rather than all at once. Master that principle and the rest follows.
In this guide, we cover everything from skin prep to the specific brush motions that professional makeup artists use, broken down by skin type. We also clear up one of the most common points of confusion in the category: the difference between powder foundation (your base, your coverage), foundation setting powder (the layer that locks your liquid base in place), and mineral foundation (a specific formula type within the powder category). Each has a different application method, and mixing them up is one of the most reliable ways to end up with cakey, heavy-looking makeup.
Powder Foundation vs. Setting Powder vs. Mineral Foundation: Know What You’re Using
Before technique matters, product clarity matters. These three terms are used interchangeably in most guides — but they’re different products, used at different stages of a makeup routine, applied with different tools and pressures. Using the wrong method for the wrong product is the most common source of cakiness and uneven coverage.
| Product | What It Is | When It Goes On | Primary Purpose | Key Application Tool |
|---|---|---|---|---|
| Powder Foundation | A pigmented powder that functions as your primary base — replaces liquid foundation entirely | After moisturiser and primer, as the base layer | Coverage, skin tone evening, shine control | Flat-top kabuki brush or dense buffing brush |
| Foundation Setting Powder | A translucent or lightly tinted powder applied over liquid foundation to lock it in place | After liquid or cream foundation, as the finishing layer | Longevity, shine control, reduces transfer — does not add coverage | Fluffy powder brush (for diffusion) or puff (for pressing/baking) |
| Mineral Foundation | A powder foundation made from naturally derived minerals (titanium dioxide, zinc oxide, mica, iron oxides) with no synthetic fillers | After moisturiser, as the base layer | Coverage + skin-health benefits; non-comedogenic; built-in SPF | Loose: kabuki/buffing brush. Pressed: flat-top or dome brush |
| Finishing Powder | Ultra-fine translucent powder that blurs pores, softens texture, and adds a skin-perfecting finish over any base | Last step of the face base | Skin perfecting, soft-focus effect, light shine control — not coverage or setting | Large fluffy powder brush, light strokes only |
The Critical Layering Rule: Powder products must go over powder, and liquid products must go under powder — never the other way around. If you apply a liquid product (liquid concealer, dewy primer, cream blush) over powder foundation, the two formulas will ball up, pill, and create visible texture on the skin. This is why if you use powder foundation as your base, all your other face products — concealer, blush, bronzer, highlighter — must also be in powder form.
Why Powder Foundation Behaves Differently from Liquid
Understanding the physics makes the technique make sense. Liquid foundation contains emulsifiers — ingredients that spread the product across skin as a continuous film, self-levelling and flowing into contours. You can afford imprecise brush strokes because the formula compensates.
Powder foundation does none of that. It does not flow, does not self-level, and does not compensate for heavy-handed application. Instead, it transfers from brush to skin as loose particles that settle and stabilise layer by layer. If you apply too much in one pass, those particles build up in pores and creases rather than blending through them. If your brush strokes are too large and sweeping, the powder distributes unevenly — landing densely in some areas and barely touching others.
The implication: controlled, deliberate deposition beats speed every time. Powder foundation rewards patience and light hands. It punishes heavy-loading and broad, sweeping strokes.
The Right Tools: How to Choose Your Brush, Sponge, or Puff
Tool choice is more consequential for powder foundation than for any other makeup product. The wrong brush can make a good powder foundation look patchy and uneven; the right brush makes it look like skin. Here’s the complete breakdown.
Brush Types and When to Use Each
For Powder Foundation (Your Base)
- Flat-top kabuki brush — the most reliable tool for powder foundation coverage. Dense, tightly packed synthetic bristles deposit product with controlled precision and buff it into a skin-like finish. Best for: medium-to-full coverage, oily skin, humid climates. Technique: buffing in small circular motions.
- Dome-top / rounded kabuki brush — softer than flat-top; slightly less coverage but more natural finish. Good for: light coverage, sensitive skin, mineral foundations. Technique: gentle circles or pressing motions.
- Stippling brush (duo-fibre) — two lengths of bristles create a light, airbrushed finish. Less coverage than kabuki but more seamless. Good for: light buildable coverage on normal to combination skin. Technique: stippling (tap and lift, do not swipe).
- Dry flat sponge / puff — delivers the most coverage because it presses powder into skin with direct contact rather than distributing it. Good for: very full coverage, oily skin, baking. Technique: press, roll, and lift — never drag.
For Foundation Setting Powder (Over Liquid Base)
- Large fluffy powder brush — the best tool for light setting. Its loose, airy bristles deposit minimal product across a broad area without disturbing the liquid foundation underneath. Best for: everyday light setting, normal to combination skin, natural finish.
- Tapered powder brush — more precision than a large fluffy; good for setting specific zones (under eyes, around nose) without over-applying to the whole face.
- Velvet puff — pressing a puff with setting powder creates a stronger, longer-lasting set — ideal for oily skin, high-humidity conditions, or “baking” the under-eye area. Technique: press flat against skin, hold 30–60 seconds, dust off excess.
- Beauty sponge (dry only) — can be used to press setting powder into specific areas for spot-setting without disturbing coverage. Never use a damp sponge with setting powder — wet + powder = instant caking.
The Single Most Common Brush Mistake
Using a loose powder setting brush (large, very fluffy, soft) to apply powder foundation. These brushes are engineered to distribute as little product as possible across as wide an area as possible — which is exactly what you want when applying finishing powder over a liquid base, and exactly the opposite of what you need when building coverage with a powder foundation. A setting brush used for powder foundation creates wispy, uneven coverage that looks like you barely applied anything.
For powder foundation coverage, you need a brush with enough density to pick up product reliably and enough firmness to deposit it in controlled, deliberate strokes. A flat-top kabuki is the gold standard. If you only own setting brushes, a dry beauty sponge pressed gently into powder will outperform a fluffy setting brush every time.
Tool Hygiene: Why It Matters More for Powder
Dirty brushes affect powder foundation more visibly than they affect liquid — the dry texture means that old product buildup in bristles deposits as coloured streaks directly on skin rather than blending through. Clean powder foundation brushes at least once a week with a gentle brush cleanser or mild soap and water. Allow to dry fully, bristle-end down, before use. A damp brush used with powder foundation is guaranteed to cause caking: the moisture binds the powder into clumps the moment it contacts the bristles.
Skin Prep: The Step That Determines Whether Powder Foundation Succeeds or Fails
Powder foundation is not forgiving of unprepared skin. Liquid foundation fills in and smooths over surface texture; powder foundation settles into it and emphasises it. Every minute you spend on skin prep pays double dividends with powder.
The Prep Sequence
- Cleanse thoroughly. Powder does not adhere well to skin with overnight sebum, sunscreen residue, or leftover moisturiser on the surface. Start with a clean, balanced base. If you cleansed the previous night and your skin is clean in the morning, a simple rinse with cool water may be sufficient — but do not skip this step.
- Exfoliate 2–3 times per week (not the day of application). Dry, flaky patches are powder foundation’s worst enemy — loose skin cells catch powder particles and make them clump visibly. Regular, gentle exfoliation (a chemical exfoliant like a low-percentage AHA or a gentle physical exfoliant) keeps the surface smooth and reduces the texture that powder clings to. Do not exfoliate the same morning you plan to wear powder foundation; freshly exfoliated skin is more reactive.
- Apply moisturiser — even on oily skin. This is the most counter-intuitive prep step for oily skin types, but it’s essential. Powder foundation applied to dry, unhydrated skin immediately clings to flaky areas, settles into fine lines, and creates an uneven, patchy finish. Use a lightweight, oil-free gel moisturiser for oily skin; a richer cream for dry skin. Allow it to absorb for at least 5 minutes — ideally 10 — before the next step.
-
Use primer — but choose it carefully for powder. Not all primers play well with powder foundation. Silicone-based primers (the kind that feel slippery and pore-filling) create a surface that powder can’t grip, causing it to slide and distribute unevenly. For powder foundation specifically:
- Dry skin: use a lightweight hydrating primer or a skin oil pressed in before powder — this creates a slightly tacky surface that powder adheres to better
- Oily skin: use a mattifying, water-based or clay-based primer; apply only to T-zone; avoid heavy silicone primers that make the skin surface too slippery
- Normal/combination skin: a thin layer of hydrating primer or no primer at all; let the moisturiser act as the base
Allow primer to become slightly tacky — not fully dry, not wet — before applying powder. Completely dry primer is too smooth; wet primer will cause caking.
- For dry skin only: press a few drops of facial oil into cheeks before powder. Professional makeup artist Ashley Gomila specifically recommends applying a facial oil to drier areas and blemishes before powder foundation: it creates a slightly adhesive base that helps powder grip, prevents emphasising dry patches, and gives powder foundation a more luminous, skin-like finish on skin that would otherwise look flat and chalky.
The Primer Tackiness Test: Touch your primer-prepped skin lightly with the back of your hand. You should feel very slight resistance — a barely perceptible stickiness, like the back of a Post-it note. That’s the window for ideal powder adhesion. Too wet: your powder will cake. Fully dry and non-tacky: your powder will slide and distribute unevenly. Most primers reach this state 60–90 seconds after application.
How to Apply Mineral Foundation: The Swirl, Tap, Buff Method
Mineral foundation — loose or pressed, made from zinc oxide, titanium dioxide, mica, and iron oxides — has a specific application method that activates the formula correctly. The classic swirl, tap, buff sequence isn’t arbitrary: each step serves a mechanical purpose.
- Tap a small amount of mineral foundation into the cap or lid. Never dip your brush directly into the jar of loose mineral foundation — you pick up far more product than you need, and the excess creates instant caking. Dispensing a small amount separately gives you controlled, conservative pickup. For pressed mineral foundation, tap the brush directly on the surface once.
- Swirl the brush in the product. Work the brush in small circular motions over the dispensed powder for 5–10 seconds. This step loads the bristles evenly — distributing powder throughout the brush head rather than concentrating it on the contact surface. An evenly loaded brush applies powder in a thin, consistent layer; a brush with product concentrated on one side creates streaks.
- Tap the brush against the lid or your hand to remove excess. This is the step most people skip — and it’s one of the most important. Tapping dislodges loose powder particles that are not anchored in the bristles. If you skip this step, those particles deposit all at once on first skin contact as a clump or visible dusting rather than distributing gradually through buffing. After tapping, your brush should look almost like it has no product — this is correct.
- Begin application at the centre of the face. Start on your nose, centre forehead, and chin — the areas most prone to redness, blemishes, and uneven tone. Work outward from the centre. This concentrates coverage where it’s most needed and naturally feathers it out at the edges (cheeks, temples, jawline) for a seamless, no-line finish.
- Buff in small, firm circular motions. Work the brush in tight circular movements using light-to-medium pressure. The circular motion activates the minerals — transforming them from visible powder particles to a silky, skin-integrated coverage. Do not sweep broadly. Small circles in one area, then move. This is how you build coverage without buildup.
- Build in thin layers rather than one heavy pass. Go over the whole face once with the first light layer, then assess. Pick up a small additional amount and work specifically on areas needing more coverage — blemishes, redness, discolouration. Layer three thin passes will always outperform one heavy application.
- Blend into the neck and hairline. With whatever powder remains on the brush after the face, lightly buff along the jawline and down the neck. Mineral foundation with a visible line at the jaw is one of the most common and easily avoided application mistakes.
How to Apply Pressed Powder Foundation
Pressed powder foundation is more concentrated than loose mineral powder — the particles are compressed, which means they deposit more product per stroke and build coverage faster. The technique adjusts accordingly: less product per pass, more deliberate placement.
- Prep skin as above — moisturise, prime if using, allow to reach the tacky window.
- Load the brush lightly. With a flat-top or dome kabuki brush, sweep gently across the surface of the pressed powder twice. Do not press down — you want a light loading, not a dense one. Tap off excess.
- Apply with a pressing and buffing motion — not sweeping. Press the brush flat against the skin, then buff in small circles. The press motion embeds powder particles into the skin surface rather than sitting on top. Do not use long, sweeping strokes — this drags the product across the surface unevenly and disrupts primer beneath.
- Focus first on coverage zones: nose, forehead centre, chin. Apply a slightly more concentrated layer here before blending outward.
- For higher coverage, use the included sponge puff. The puff applicator included with most pressed powder compacts delivers significantly more coverage than a brush because it presses product directly into skin with maximum contact. Press the puff against the powder surface, then press (do not rub) against skin, working in sections. This is the fastest route to full coverage from a pressed powder formula.
- Feather the edges. Use a clean fluffy brush with no product to lightly buff the edges — jawline, hairline, around the nose — to soften any hard lines and blend the powder foundation seamlessly into uncoated areas.
How to Apply Foundation and Setting Powder Together
Using powder foundation as a setting step over a liquid base is one of the most versatile and widely used techniques in professional makeup. It gives you the coverage and skin-like finish of liquid foundation with the longevity and shine control of powder on top. This is the correct method for the “how to apply foundation and powder” question — and the order matters completely.
The Correct Layering Sequence
- Apply skincare (cleanser, toner, serum, moisturiser). Allow everything to fully absorb — at least 5 minutes. Powder applied over wet skincare layers will cake immediately.
- Apply primer if using. Allow to reach the tacky stage before proceeding.
- Apply liquid foundation. Use your usual liquid foundation method — brush, damp sponge, or fingers. Build coverage as desired and allow 30–60 seconds for the formula to begin setting. The liquid foundation should feel dry (not wet) to the touch before powder goes over it. Applying powder over wet liquid foundation creates a thick, opaque layer that looks cakey and heavy.
- Apply concealer where needed. Under eyes, over blemishes or spots. Blend fully. Allow to set slightly.
-
Apply foundation setting powder. This is the critical step — and tool choice determines the result:
- For a natural, everyday set (most skin types): load a large fluffy brush lightly with translucent setting powder, tap off excess, and dust gently across the face with a light sweeping motion. The airy brush deposits a thin veil of powder that sets the liquid base without adding visible coverage or changing the finish dramatically.
- For maximum longevity and oil control (oily skin): use a velvet powder puff pressed with translucent setting powder. Press the puff flat against oily zones (T-zone, nose, forehead, chin) and hold for 10–15 seconds. This technique “bakes” the foundation — setting it with sustained pressure into a transfer-resistant, oil-controlling layer. Brush away excess after 5–10 minutes with a large fluffy brush.
- For the under-eye area specifically: use a small tapered brush or the pointed tip of a beauty sponge to press a light layer of finely milled setting powder under the eyes. Gently press — do not sweep, which disturbs concealer — and dust away any excess with a clean brush.
- Finish with any powder face products (blush, bronzer, highlighter). These must all be in powder form if you have powder as the topmost layer. Apply in this order: bronzer first (contouring), then blush, then highlighter last.
The Baking Technique Explained: Baking refers to applying a generous layer of loose setting powder and leaving it on the skin for 5–10 minutes before brushing off. During this time, the heat from your skin “bakes” the foundation and concealer underneath — setting them with extra longevity and crease-resistance. It is most effective under the eyes (where concealer creases fastest) and on the T-zone (where liquid foundation slides first). It is not necessary for everyday wear but makes a significant difference for long events, photography, and oily skin in warm conditions.
How to Apply Powder Foundation by Skin Type
The core technique is the same for all skin types, but several adjustments make a meaningful difference depending on your skin’s specific needs.
Oily Skin
Powder foundation is arguably the best possible base for oily skin — the mineral particles absorb sebum as it migrates to the surface, providing oil control that liquid foundations can’t replicate. The adjustments for oily skin:
- Skip heavy moisturiser — use a lightweight gel. Too much surface moisture causes powder to ball up and distribute unevenly.
- Use a water-based or clay primer on the T-zone only. Do not use silicone pore-filling primers — they create too slippery a surface for powder to adhere to properly.
- Apply with a flat-top kabuki or dry sponge puff for maximum oil control. The dense pressure of these tools embeds powder more deeply into the skin, creating a longer-lasting oil barrier than a fluffy brush.
- Set over powder foundation with a light dusting of translucent powder on the T-zone. Yes — this is powder on powder. A very light dusting of translucent setting powder pressed over your powder foundation on oily zones creates a second layer of oil absorption without adding visible coverage.
- Carry blotting papers for midday. Press flat against oily areas, then lightly dust with pressed powder to reset. Never apply more powder foundation over saturated oil-covered skin — blot first.
Dry Skin
Dry skin is the most challenging skin type for powder foundation — the dry, sometimes flaky surface catches powder particles and makes them visibly cluster. With the right prep, however, powder foundation can work beautifully on dry skin:
- Hydrate thoroughly — and add a facial oil. Apply a richer moisturiser and press 2–3 drops of facial oil into the skin (especially cheeks and any dry patches) before powder. The oil creates a slightly adhesive surface that helps powder adhere smoothly rather than clumping on dry texture.
- Never apply powder to dry, flaky patches without prepping them. Use a damp finger or cotton pad to gently smooth any flaky areas before powder application. Powder on flaking skin is always visible.
- Use a dome kabuki or stippling brush — not a flat-top. Softer, rounder brushes deposit powder more gently and are less likely to drag on dry skin surface. A fluffy dome brush used with light buffing circles gives the most natural result on dry skin.
- Apply in fewer, lighter layers. Dry skin benefits from less product overall. Two thin layers are better than three — every additional layer increases the risk of powder accumulation at dry patches and fine lines.
- Avoid setting with translucent powder. Dry skin does not need additional mattifying. If you must set (for longevity), use a finely milled, hydrating setting powder only on the T-zone.
- Finish with a dewy setting spray. Misting a hydrating, non-alcohol setting spray over powder foundation gives it a more skin-like, less powdery appearance on dry skin — blending the finish between matte and natural.
Combination Skin
Combination skin requires the most nuanced approach because different zones have different needs. The strategy is zone-specific application rather than one uniform technique across the whole face:
- Prep the T-zone with mattifying primer; prep the dry cheeks with moisturiser or light oil. Different primers for different zones is not overcomplicated — it’s what professional artists do for combination skin.
- Apply a lighter layer over cheeks and dry zones; build coverage over oily zones. Use a flat-top kabuki on the T-zone with firm pressure for oil control; switch to a dome brush or lighter touch over cheeks for a more natural, less mattified finish.
- Selectively set only the T-zone with translucent setting powder; leave cheeks unsetting or use the lightest possible dusting.
Sensitive Skin
Mineral foundation is the most appropriate powder foundation choice for sensitive skin — the simple, five-ingredient mineral formula eliminates the emulsifiers, preservatives, and fragrance that trigger reactions in reactive skin. Application adjustments:
- Use a soft dome brush with natural or ultra-soft synthetic bristles. Avoid dense, stiff brushes that drag across reactive skin.
- Use gentle pressing and lifting motions rather than circular buffing. Circular buffing creates more friction than sensitive skin benefits from. Pressing and gentle dabbing deposits product with minimal irritation.
- Build coverage gradually and avoid over-layering. Sensitive skin benefits from minimal product contact. A light, even application achieves more with less product and less manipulation.
Building Coverage: Light, Medium, and Full with Powder Foundation
One of the most persistent myths about powder foundation is that it only delivers light coverage. The right technique can build powder foundation from a barely-there skin tint to genuinely full coverage — the variable is how you layer, not the product itself.
Light Coverage: The Quick, Natural Finish
For a natural, effortless finish — ideal for low-key days, when you want skin to show through, or for those new to powder foundation:
- Use a large, fluffy dome or fan brush with a light loading
- Apply with the “sun-kissed” technique: focus on the areas where the sun naturally hits first — forehead, cheekbones, nose, chin, jaw — and buff lightly outward
- Do not try to cover everything; let the powder even the tone rather than providing coverage
- One light pass across the entire face is typically sufficient
Medium Coverage: The Everyday Finish
The most versatile everyday result — evens tone, blurs pores, covers minor redness and texture:
- Use a flat-top or dome kabuki brush with a moderate loading
- Apply one full pass across the face with small buffing circles
- Build a second, lighter pass specifically over areas needing more coverage (redness, dark spots, blemishes)
- Feather the edges at hairline, jawline, and around the nose
Full Coverage: Maximum Powder Foundation Performance
Full coverage from powder foundation is achievable and realistic — but it requires patience and the right tools:
- Use a velvet puff or dry beauty sponge instead of a brush — direct skin contact deposits more product and presses it in more completely than bristles can
- Press the puff against the product, then press (not rub) onto skin in sections: forehead, each cheek, nose, chin
- Build three to four thin layers in this pressing motion, allowing each to set for 30 seconds before adding the next
- Use a separate concealer on stubborn spots before or after your powder foundation layers — pressing powder concealer or cream concealer (under the powder, not over it) gives precise spot coverage that buildable layers of powder foundation alone may not fully achieve
- Finish by pressing a powder puff over the entire face to even out coverage and eliminate any visible texture from layering
Midday Touch-Ups: How to Reset Powder Foundation Without Caking
Midday touch-ups with powder are the most common context in which caking happens — adding more product over the oil and product breakdown from the morning application. The key is preparing the surface before adding anything.
- Blot first. Press a blotting paper or blotting film flat against any oily areas — T-zone, around the nose, chin. Hold for 5–10 seconds and lift cleanly without rubbing. This removes excess sebum without disturbing the foundation underneath.
- Assess what actually needs touching up. After blotting, look at your face in natural light. Often, what appeared to need a touch-up was excess oil sitting on top of intact foundation. After blotting, the foundation may look fine without any additional product.
- If coverage has faded: press a dry sponge lightly into pressed powder foundation and tap onto areas where coverage has broken down. Do not sweep — press and lift in small sections. This deposits fresh coverage without dragging what’s underneath.
- If shine only (no coverage loss): dust a very small amount of translucent setting powder over the oily zones using a small tapered brush. Less is more — one pass with a lightly loaded brush is sufficient. Repeat touch-ups compound over the day and will result in caking by the late afternoon.
- Finish with a mist of setting spray to meld the fresh and existing powder layers together, preventing the visible “just touched up” look.
8 Common Powder Foundation Mistakes and How to Fix Them
| Mistake | What It Causes | The Fix |
|---|---|---|
| Loading the brush too heavily | Caking, visible powder clumps, emphasised pores and fine lines | Swirl lightly and tap off all excess before every application. The brush should look almost product-free |
| Using a fluffy setting brush for powder foundation | Uneven, patchy coverage; product distributed too lightly and inconsistently | Switch to a flat-top or dome kabuki — denser bristles deposit powder with control |
| Skipping moisturiser on oily skin | Dehydrated skin overproduces sebum; powder breaks down faster and looks uneven | Use a lightweight, oil-free gel moisturiser; allow to absorb fully before powder |
| Applying with broad sweeping strokes | Streaky, uneven coverage; product swept away from high points of face | Use small, tight circular buffing motions in one area at a time |
| Dipping brush directly into loose powder jar | Massive overload of product; immediate caking on contact with skin | Tap a small amount into the lid, then swirl your brush in the lid |
| Applying liquid product over powder foundation | Pilling, balling, visible texture — the two formulas don’t mix | All products over powder foundation must also be powder; liquid concealer must go under, not over, powder base |
| Using a damp brush or damp sponge with powder | Instant caking — moisture binds dry particles into clumps | Keep all powder application tools completely dry; use a fresh, dry tool for every powder application |
| Touching up over oily skin without blotting first | Powder + oil = cake; visible buildup on skin by end of day | Always blot with blotting paper before any powder touch-up; assess whether coverage actually needs refreshing after blotting |
Frequently Asked Questions
What is the difference between powder foundation and setting powder?
Powder foundation is a pigmented base product that provides coverage and replaces liquid foundation — it’s your primary complexion product. Foundation setting powder is a translucent (or very lightly tinted) powder applied over liquid or cream foundation to lock it in place, extend wear, and control shine. Setting powder does not add coverage; powder foundation does. They go on at different stages of the routine and require different application tools — a dense kabuki for powder foundation, a fluffy brush or puff for setting powder.
How do I apply mineral foundation correctly?
The classic method is swirl, tap, buff. Tap a small amount of mineral foundation into the product lid. Swirl a flat-top or dome kabuki brush in the powder for 5–10 seconds to load the bristles evenly. Tap the brush firmly against the lid to release all loose excess. Then buff into skin in small, tight circular motions starting at the centre of the face — nose, forehead, chin — and working outward. Build coverage in thin layers rather than one heavy pass. The circular buffing motion is what activates the minerals and transforms them from powder to a skin-integrated coverage.
Can powder foundation work on dry skin?
Yes — with the right prep. The key is pressing a few drops of facial oil into the skin before powder (especially on dry patches), using a soft dome or stippling brush rather than a dense kabuki, and keeping application layers light. Never apply powder to flaky or peeling skin without smoothing those areas first — powder clings to loose skin cells and makes them visible. Finish with a hydrating setting spray to give the powder a more skin-like, dewy appearance on dry skin.
What brush is best for powder foundation?
A flat-top kabuki is the most reliable all-around tool for powder foundation — dense, tightly packed bristles deposit powder with controlled precision and buff it into a seamless finish. A dome-top kabuki offers a softer, slightly more natural finish for those who want lighter coverage. The common mistake is using a large, fluffy powder setting brush — these are designed to deposit as little product as possible, and they create patchy, inconsistent coverage when used for a powder foundation base.
How do I stop powder foundation from looking cakey?
Cakiness almost always has one of three causes: too much product per application pass, building over dry patches that weren’t properly prepped, or using a brush that deposits inconsistently. Fix: tap off all excess product from your brush before every pass (the brush should look almost product-free), hydrate and smooth dry patches before powder, and build in three or four thin layers rather than one heavy application. If you’re already wearing caky powder, do not add more — blot with a dry sponge to absorb the excess, then mist with setting spray to meld the layers.
Does powder foundation need to be set?
Generally, no — powder foundation is self-setting. Unlike liquid foundation, which remains tacky until a setting powder or spray locks it down, powder foundation sets on contact with the skin surface. On very oily skin, a very light dusting of translucent setting powder pressed over the T-zone can extend oil control; on all other skin types, the powder foundation itself is the finishing step. A mist of setting spray over powder foundation is useful to meld the layers and give a more natural, less powdery finish — this is recommended for dry skin in particular.
How do I apply powder foundation and liquid foundation together?
Apply your liquid foundation first over moisturised, primed skin. Allow it to dry slightly — 30 to 60 seconds — until it feels dry to the touch but not fully set. Then apply a translucent or lightly pigmented setting powder over the top using a fluffy brush (for a natural set) or a puff with pressing motions (for maximum longevity and oil control). This layering sequence — liquid first, powder second — gives you the coverage and skin-like finish of liquid with the longevity of powder. Never apply liquid products over powder; liquid over powder causes pilling and texture.
How do I apply powder foundation without it looking powdery?
The powdery look comes from too much product or too light a buffing action. Fix: load your brush very lightly and tap off all excess; buff in small, firm circular motions that activate and embed the powder rather than leaving it sitting on the surface; and finish with a fine mist of hydrating setting spray, which melds powder particles into the skin and removes the visible powdery film. For dry skin, the facial oil prep step (pressing a few drops of oil into the skin before powder) is the most effective single adjustment to prevent a powdery appearance.
Can I use a beauty sponge for powder foundation?
Yes — but only if the sponge is completely dry. A dry beauty sponge pressed into powder foundation and then pressed (not rubbed) against skin delivers excellent full-coverage results — the direct contact deposits more product and embeds it more deeply than a brush. Never use a damp sponge with powder foundation: the moisture binds dry particles into clumps on contact, creating instant caking that cannot be blended out. Keep a dedicated dry sponge separate from your wet sponge specifically for powder work.
The One Principle Behind Every Perfect Powder Foundation Application
Every technique in this guide comes back to the same principle: controlled, deliberate deposition in thin layers. Powder foundation doesn’t flow, doesn’t self-level, and doesn’t compensate for imprecision the way liquid does. But it rewards patience and light hands with a finish that looks genuinely like skin — effortless, breathable, and long-lasting in a way that liquid foundation rarely achieves.
Start with well-hydrated, smooth skin. Use the right brush for what you’re trying to achieve — a flat-top kabuki for coverage, a fluffy brush for setting. Load lightly and tap off all excess before every pass. Build in thin layers. Keep everything over your powder base in powder form. And if your midday result isn’t what you want, blot before you reach for more product.
Master those habits and powder foundation will stop being the format that “doesn’t work for your skin” and start being the one that makes everything else easier.