

Black eye makeup is one of the most dramatic and versatile looks in makeup — it works for a soft smoky everyday eye, a full-on gothic lid, and everything between. The technique gap between “stunning” and “patchy” comes down almost entirely to one thing: whether you use a transition shade before the black. Without it, black eyeshadow has nowhere to blend into and the edges stay visible as hard lines regardless of how much you blend. With it, even beginners can create a seamless gradient. This tutorial covers the complete process, from eye prep through to lash line, with adjustments for different eye shapes.
- Do eye makeup before foundation — black eyeshadow fallout on a finished base is harder to fix than cleaning it up before foundation goes on.
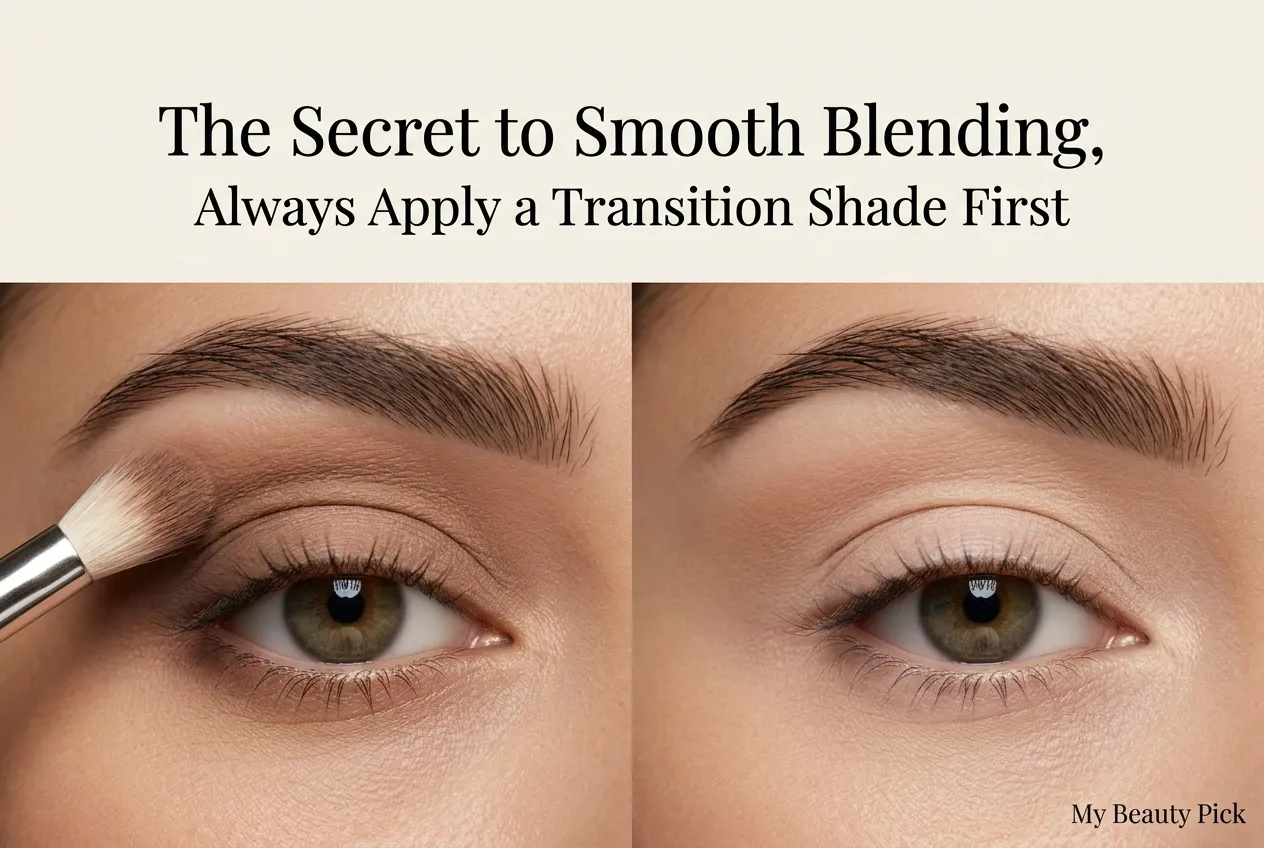
- The transition shade is non-negotiable. A matte mid-toned shade (taupe, warm brown, grey) in the crease before any black eyeshadow gives the black something to blend into.
- Less black than you think you need, applied in thin layers, is always easier to build up than trying to tone down too much.
- Tap off excess powder from the brush before each application — this reduces fallout and gives more precise placement.
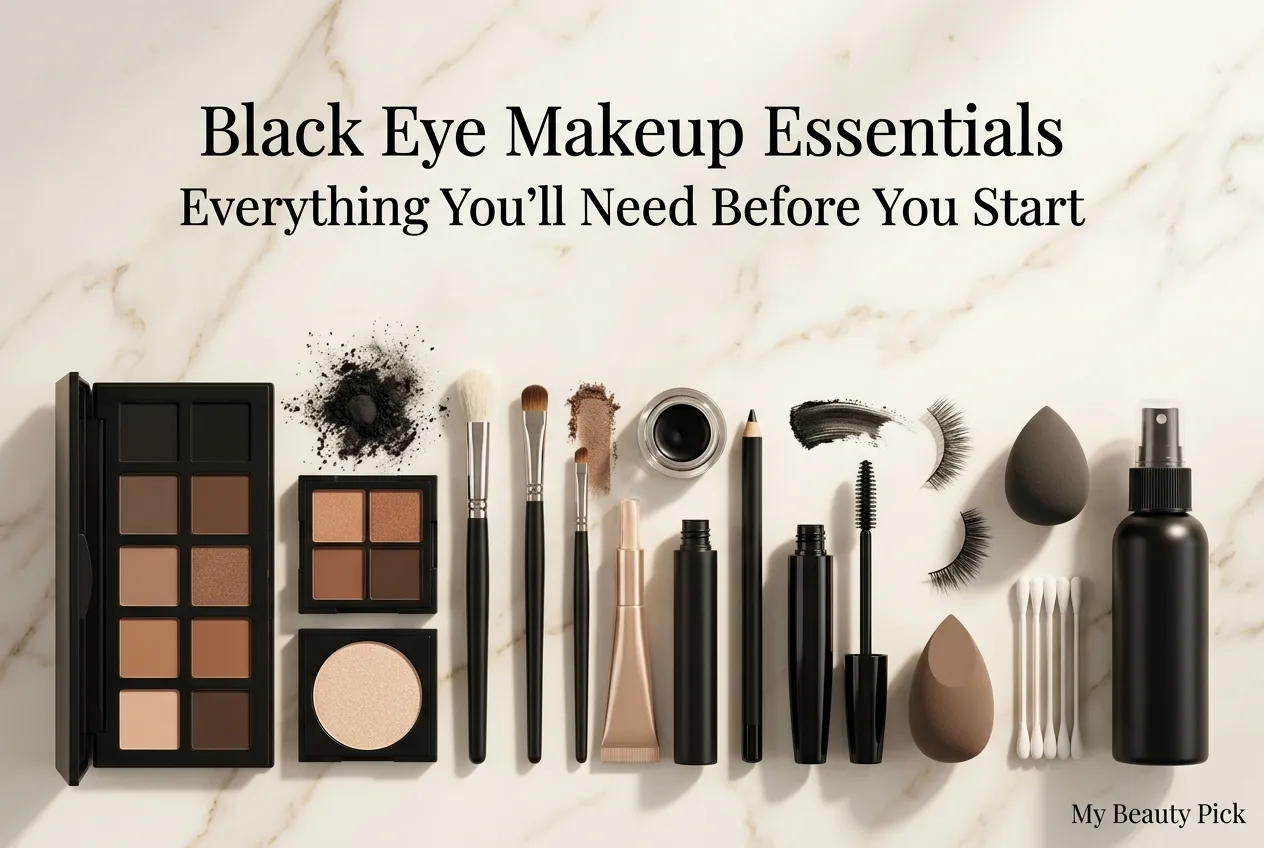
What You’ll Need for Black Eye Makeup
Eyeshadow
Matte black eyeshadow is the core of any black eye look. Matte finishes blend more smoothly than shimmer and give the most control over building intensity. A good matte black from Urban Decay, Anastasia Beverly Hills, or MAC applies without patchiness and blends without going ashy. Once the matte base is in place, you can add shimmer black or a foiled black over the lid if more dimension is wanted.
Matte transition shade — a taupe, warm medium brown, or cool grey depending on your preference. This goes on first and does the blending work. Don’t skip this.
Highlight shade — a light matte or shimmer shade for the inner corner and brow bone. Champagne, pale gold, or white depending on your skin tone.
Brushes
- Fluffy blending brush — for the transition shade and for blending edges. The most important brush in this look.
- Flat shader brush — for packing black onto the lid. The flat, dense bristles press pigment rather than sweep it.
- Small pencil or crease brush — for the outer corner, lower lash line, and precise detail work.
- Small brush or cotton swab — for cleaning up fallout and sharpening edges.
Other Products
- Eye primer — the single most important product for longevity and colour intensity. Black eyeshadow on primer looks richer and lasts twice as long as black on bare lid. Urban Decay Eyeshadow Primer Potion is the most widely recommended; e.l.f. Cosmetics Eye Primer works reliably at a budget price.
- Black gel eyeliner or kohl pencil — gel liner for a precise, long-lasting line; kohl for a softer, more smudgeable result.
- Mascara or false lashes — black volumising mascara finishes the look; false lashes for more drama.
- Setting spray — misted over the finished eye to lock all layers and intensify the black.
How to Do Black Eye Makeup Step by Step
-
1Prime the lid
Apply a thin, even layer of eye primer from the lash line to the brow bone. Press and blend with a fingertip. Let it set for 30 seconds before continuing. Primer does two things: it gives eyeshadow a surface to grip, dramatically improving colour payoff, and it prevents creasing throughout the day. Skipping primer with black eyeshadow means dealing with patchy, faded colour and creased shadow by midday. -
2Apply the transition shade in the crease
Load a fluffy blending brush with your matte transition shade (taupe, warm brown, or cool grey) and tap off the excess. Using windshield-wiper motions back and forth along the crease, build the transition shade gradually — it should sit in the crease and just above it. Blend the upper edge until there’s no visible hard line between the transition shade and bare skin. This is the gradient that the black will blend into. -
3Add a deeper shade to the outer corner
Before the black, add a deeper brown or dark grey to the outer corner of the eye using a small crease brush. This creates another step in the gradient — transition shade, then medium dark, then black — which makes the final blend significantly more seamless. Not strictly essential, but it makes a real difference to how smooth the finished look appears. -
4Pack black onto the lid and outer corner
Switch to a flat shader brush. For intensity, mist the brush lightly with setting spray before picking up the black — this packs more pigment with less fallout. Pick up a small amount of black eyeshadow, tap off the excess, and press (not sweep) onto the centre and outer lid and the outer corner of the crease. Build in thin layers, pressing the colour into the shadow rather than dragging it across. The pressing motion gives you more control over where the black goes. -
5Blend where the black meets the transition shade
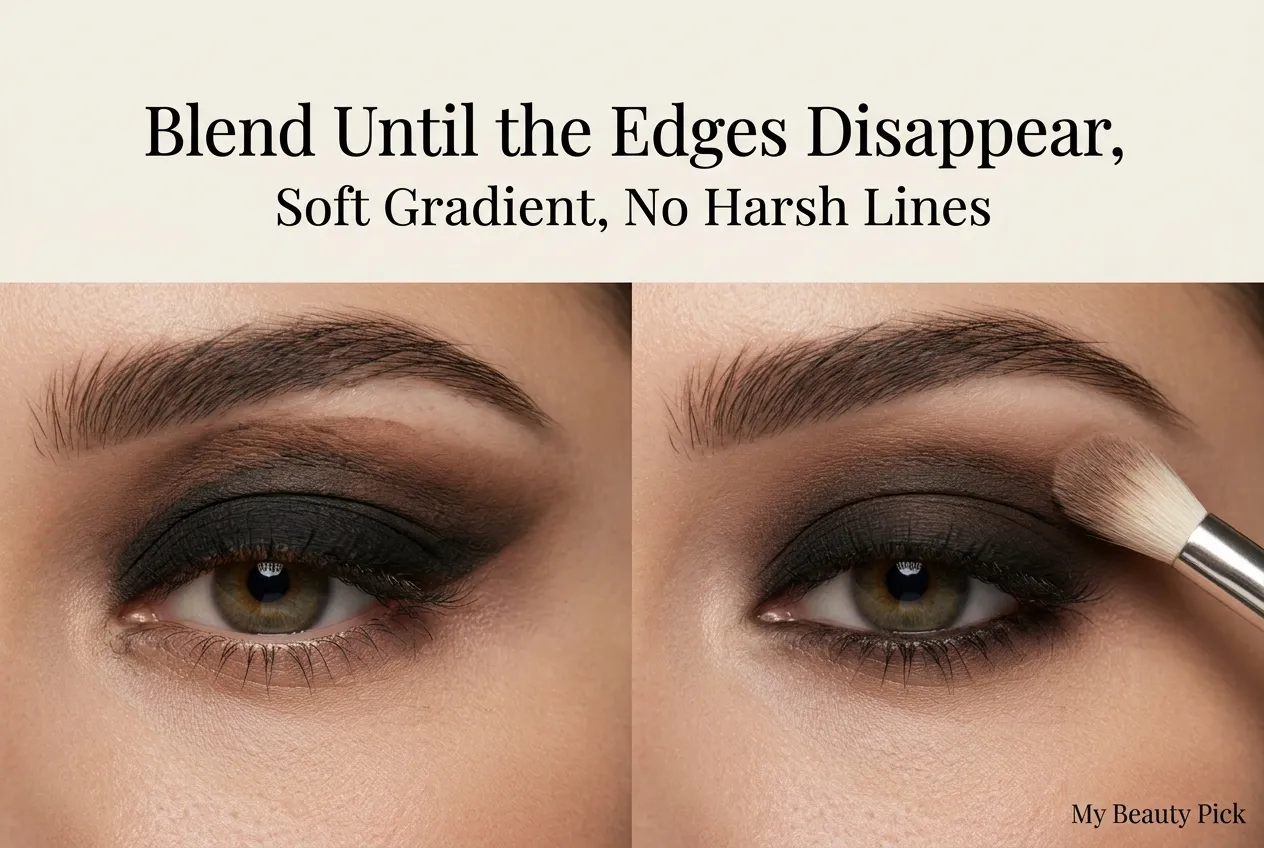
Switch to a clean fluffy blending brush — clean is important here, because a brush loaded with transition shade will muddy the black rather than blending it. Use circular buffing motions at the boundary where the black meets the transition shade, working upward and outward in small circles. The goal is to eliminate any visible line between the two colours. Look directly into the mirror and assess with your eyes open to see what the look is actually doing to your eye shape. -
6Deepen as needed
Once the first layer is blended, assess the intensity. If you want more black, add another layer with the flat shader brush using the same pressing technique, then re-blend with the fluffy brush. Building in this layer-blend-assess cycle gives you far more control than trying to achieve the final look in one pass. For a soft black smoky eye, two thin passes of black is usually enough. For a full dramatic black lid, three to four passes. -
7Apply black liner to the upper lash line
Line the upper lash line with black gel liner as close to the roots as possible. For a smoky effect, use a small brush to blend the liner edge upward into the bottom of the eyeshadow immediately after applying it, before it fully sets. This joins the liner and shadow seamlessly. For a more defined line, let the liner set before blending. -
8Smoke out the lower lash line
Using a small pencil brush and the black eyeshadow (or a slightly softer charcoal or dark grey if the full black lower lash line is too intense), apply shadow along the lower lash line from the outer corner inward. For a soft smoky look, go halfway in and blend downward. For a more dramatic look, line the full lower lash line and connect it to the outer corner above. On round eyes, keeping the lower liner in the outer two-thirds rather than the full line prevents the eye from looking smaller. -
9Highlight the inner corner and brow bone
Apply a light shimmer or matte highlight shade to the inner corner of the eye — this brightens and opens the eye significantly after all the dark shadow. A pale champagne, soft gold, or white pearl works. Apply a matte highlight along the brow bone and blend downward. On tan skin, a warm gold or champagne rather than a stark white looks more naturally luminous. -
10Clean up fallout, then apply mascara or lashes
Use a dry cotton swab or a flat brush to remove any black eyeshadow that’s fallen under the eye during application. Then apply foundation or concealer under the eye. Finish with black mascara — two coats, wiggling the wand at the lash roots before pulling through. Add individual false lashes or a strip lash at the outer corner for more drama, or full false lashes for an editorial-level finish.
Do eye makeup before foundation every time you’re working with black eyeshadow. Set up a folded tissue shield pressed against the under-eye area when packing black on the lid — this catches fallout that would otherwise land on your cheek. Clean any remaining fallout with a dry cotton swab before foundation goes on. Trying to blend foundation over fallen black powder causes smearing.
How to Create a Soft Black Smoky Eye
The soft black smoky eye is the most wearable version of the look — it works for daytime occasions, office environments, and evenings without looking overtly dramatic. The difference from the full dramatic look is in how far above the crease the black extends and how softly the edges are blended.
- Apply transition shade to the crease only, not extending upward toward the brow
- Apply black to the lid and outer corner, keeping it below the natural crease
- Blend thoroughly but don’t push the black upward — let the transition shade create the fade
- Use a dark grey or charcoal on the lower lash line rather than full black
- One coat of mascara rather than false lashes
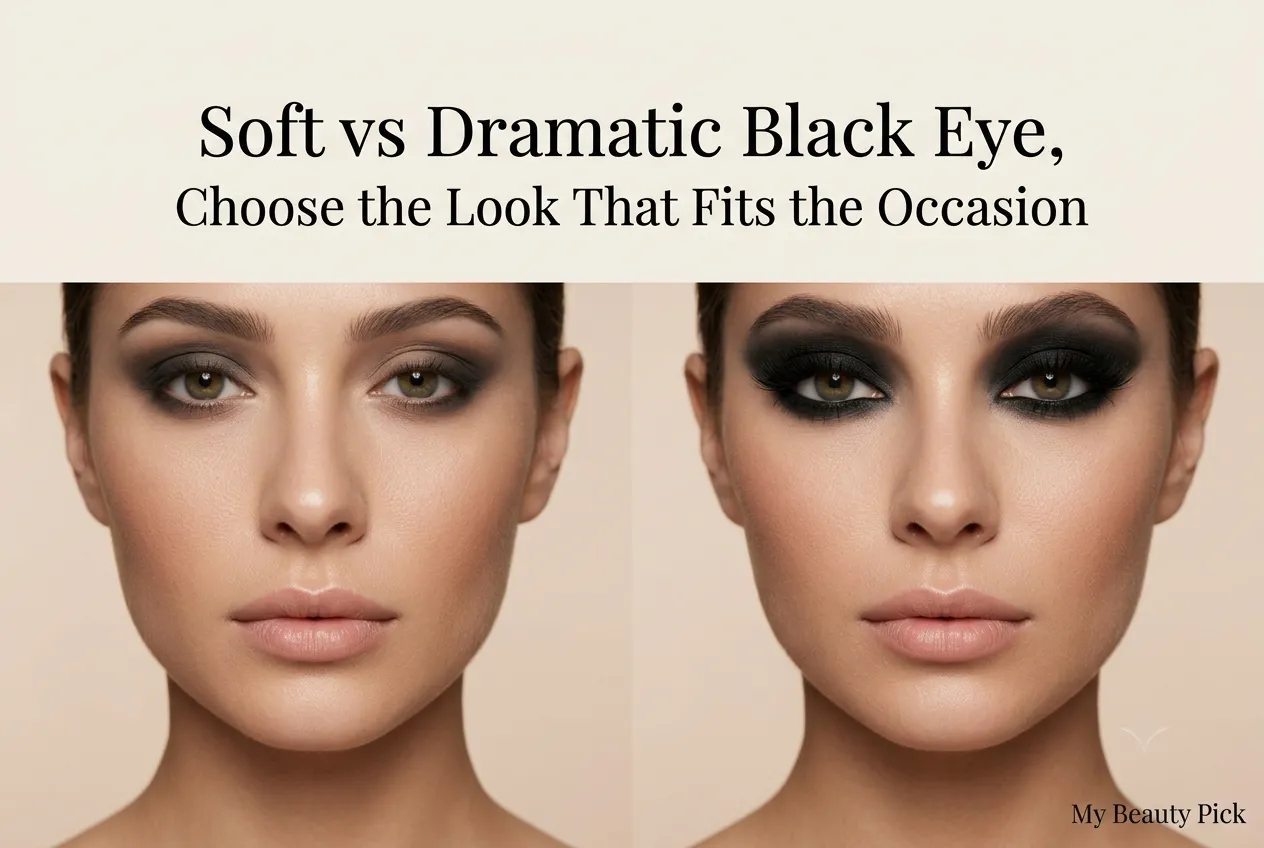
How to Create a Dramatic Full Black Eye Makeup Look
The dramatic version takes the black above the crease, fully onto the lower lash line, and uses maximum pigment intensity. This is the evening, event, and editorial-level look.
- Extend the transition shade above the crease toward the brow bone
- Build black in multiple passes until the lid is intensely pigmented
- Take the black slightly above the crease on the outer two-thirds of the eye
- Use a gel kohl pencil on the waterline (inner rim) as well as the lash line for maximum impact
- Full black on the lower lash line connecting to the outer corner above
- False lashes — dramatic volumes rather than natural
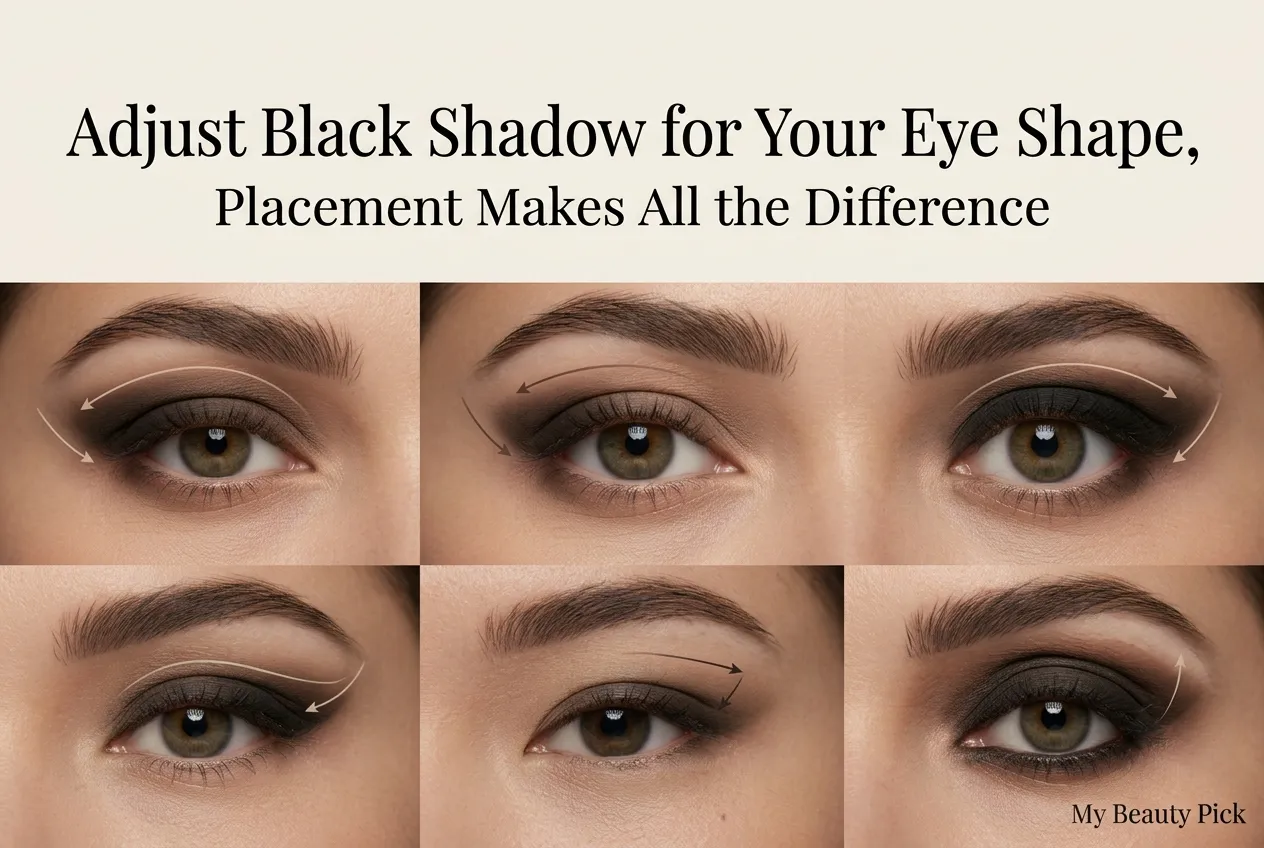
Black Eye Makeup for Different Eye Shapes
Hooded Eyes
Hooded eyes have excess skin that folds over the crease, making the mobile lid less visible when eyes are open. The solution for black eye makeup on hooded eyes: apply the transition shade and black slightly higher than feels natural when looking at your closed eye. Look forward into the mirror with your eyes open to assess placement — the shadow should be visible on the open eye, not hidden by the fold. Apply liner on the upper lash line with eyes open and looking slightly down rather than closed, so the liner is placed where it’s actually visible. Avoid lining the entire waterline on hooded eyes — it closes the appearance of the eye further.
Round Eyes
To elongate round eyes with black shadow, concentrate the black on the outer third of the lid and extend it slightly beyond the outer corner in a subtle wing shape. Keep the inner corner lighter. A subtle flick in the liner at the outer corner reinforces the elongating effect. Avoid heavy liner on the full lower lash line — it emphasises the roundness rather than elongating it.
Monolid Eyes
Monolid eyes don’t have a defined crease, so the transition-shade-in-the-crease technique needs adaptation. Instead, place the transition shade in the upper portion of the lid (the area that would be above the crease on a creased eye) and blend upward toward the brow bone. Apply the black on the lower portion of the lid close to the lash line. The gradient runs vertically on a monolid rather than around a crease shape.
Deep-Set Eyes
Deep-set eyes already appear to recede into the face. Heavy black shadow extending above the crease can make them look more receded. For deep-set eyes, keep the black on the mobile lid and lower lash line rather than pulling it upward into the crease significantly. A shimmer black or metallic on the centre lid rather than a flat matte black keeps the lid catching the light and appearing more forward.
Almond Eyes
Almond eyes suit almost any black eye makeup variation. They can wear the black anywhere on the lid — full lid, outer corner, above the crease — without distortion. The look can be symmetrical or deliberately asymmetric for editorial effect.
Black Eye Makeup for Different Eye Colors
Brown eyes: black shadow intensifies the depth of brown eyes and makes them appear richer and more dramatic. Any version of the black eye look — soft, moderate, or full dramatic — works well on brown eyes.
Blue eyes: black shadow creates a high-contrast, striking look against blue. A grey or charcoal transition shade rather than warm brown softens the contrast slightly if full drama isn’t the goal. The inner corner highlight should lean toward silver or white rather than gold to complement blue.
Green and hazel eyes: black eyeshadow intensifies green and makes hazel appear greener. A warm brown transition shade brings out green undertones more than a cool grey. Adding a thin line of copper or bronze shadow along the lower lash line underneath the black is a useful technique for hazel eyes.
On tan skin with dark eyes: black eyeshadow reads with particular richness because of the warm contrast between dark lids and warm skin tone. The black has more visual depth against warm tan skin than against fair skin, which means you can create drama with less product overall.
Matte vs Shimmer Black: Which to Choose
| Finish | Best For | Not Ideal For | Where to Apply |
|---|---|---|---|
| Matte black | Blending, depth, Gothic look, everyday smoky eye | When you want dimension or light-catching lid | Outer corner, crease, overall lid base |
| Shimmer black | Evening glamour, dimension on the lid, tan skin | Blending into the crease — shimmer emphasises texture | Centre lid over matte base |
| Glitter/foiled black | Editorial, party, maximum drama | Everyday wear, professional settings | Centre lid only, applied with finger or damp brush |
| Charcoal/dark grey | Beginners, softer smoky, lower lash line | Full intense black look | Transition into black, lower lash line |
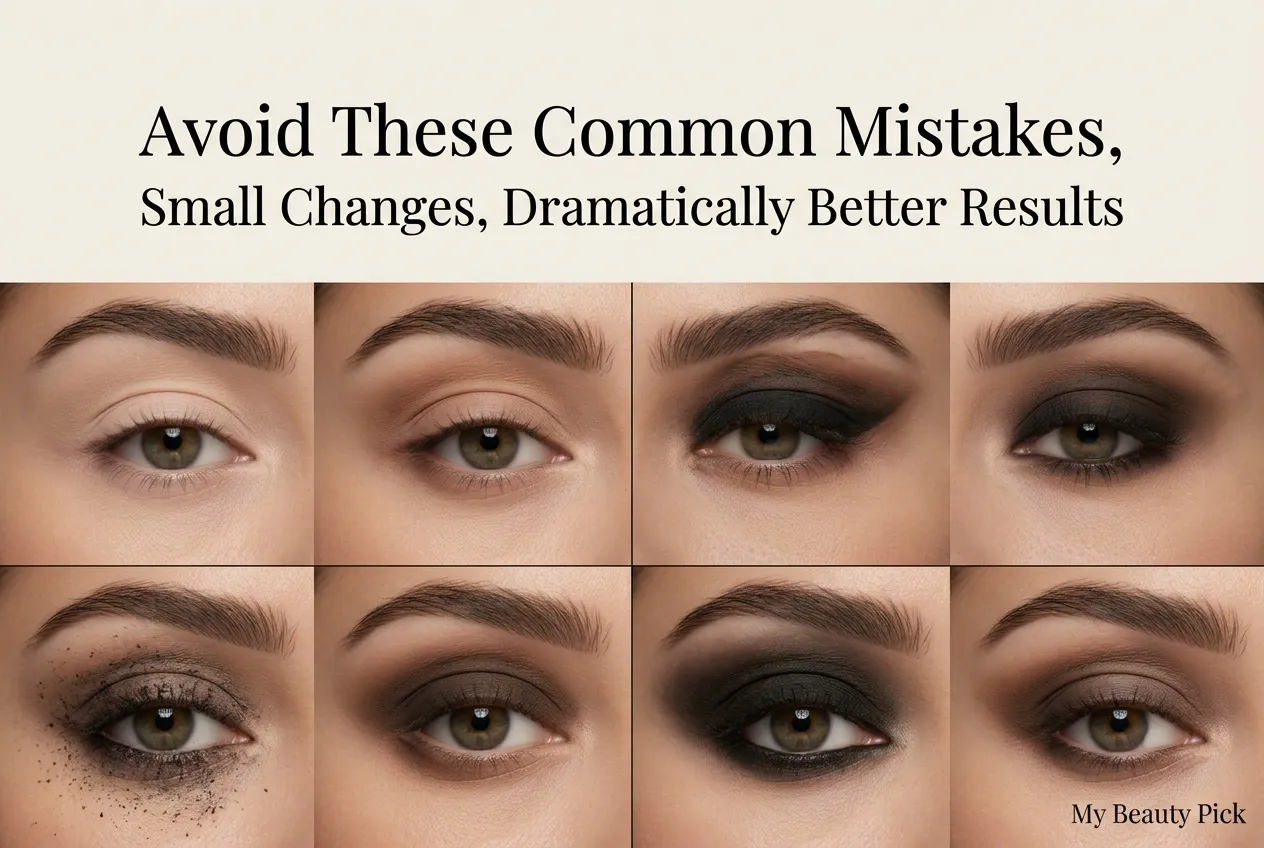
Common Black Eyeshadow Mistakes to Avoid
- Skipping the transition shade. Black applied directly without a blending buffer creates hard edges that no amount of subsequent blending will fully soften. The transition shade is structural — it’s not optional.
- Using too much black too soon. Black eyeshadow is easier to build up than to tone down. Start with less than you think you need, assess with eyes open, then add more in targeted areas.
- Blending with the same brush used to apply. A brush loaded with black colour pushed into the edges moves product laterally rather than blending it. Use a separate, clean fluffy brush for blending.
- Applying foundation before eyeshadow. Black fallout on foundation looks messy and smears when you try to clean it up. Always do eye makeup first.
- Not tapping off excess from the brush. A loaded brush drops product everywhere. Tap the handle against your hand between the palette and your eye to dislodge loose powder.
- Ignoring placement with eyes open. Looking at your closed eye in the mirror is deceptive — the placement you see there is very different from what’s visible when your eyes are open. Regularly open your eyes and look forward to assess the actual effect.
How to Make Black Eye Makeup Last All Day
Eye primer is the most important step. Without it, black eyeshadow creases and fades significantly within a few hours — particularly in the crease area. With primer, the same look lasts 10–12 hours without significant degradation.
Additional hold steps: set the finished eye with a light mist of setting spray before opening your eyes. For the liner specifically, gel liner lasts 2–3 times longer than pencil liner. If using a kohl pencil on the waterline, a quick press of black eyeshadow over the liner with a small brush sets it and significantly extends how long it stays on the waterline before transferring or fading.
How to Remove Black Eye Makeup Without Irritation
Black eye makeup — particularly gel liner on the waterline and heavily pigmented eyeshadow — requires proper removal to avoid irritation and staining. A micellar water or oil cleanser is the first step. Soak a cotton pad and hold it against the closed eye for 10–15 seconds before wiping, rather than immediately rubbing. This dissolves the product before you move it, reducing the friction needed and preventing micro-irritation to the delicate skin around the eye.
For mascara and liner specifically, a cotton swab soaked in micellar water gives precision removal at the lash line without disturbing the rest of the face. Follow with a regular cleanser for any remaining residue.
Rubbing a dry cotton pad across a fully pigmented black eye look without first dissolving the product pulls the delicate skin around the eye and leaves staining — particularly from matte black pigments with high iron oxide content. Always soak the pad first and hold before wiping. Two gentle passes with a soaked pad removes more product than ten passes rubbing dry.
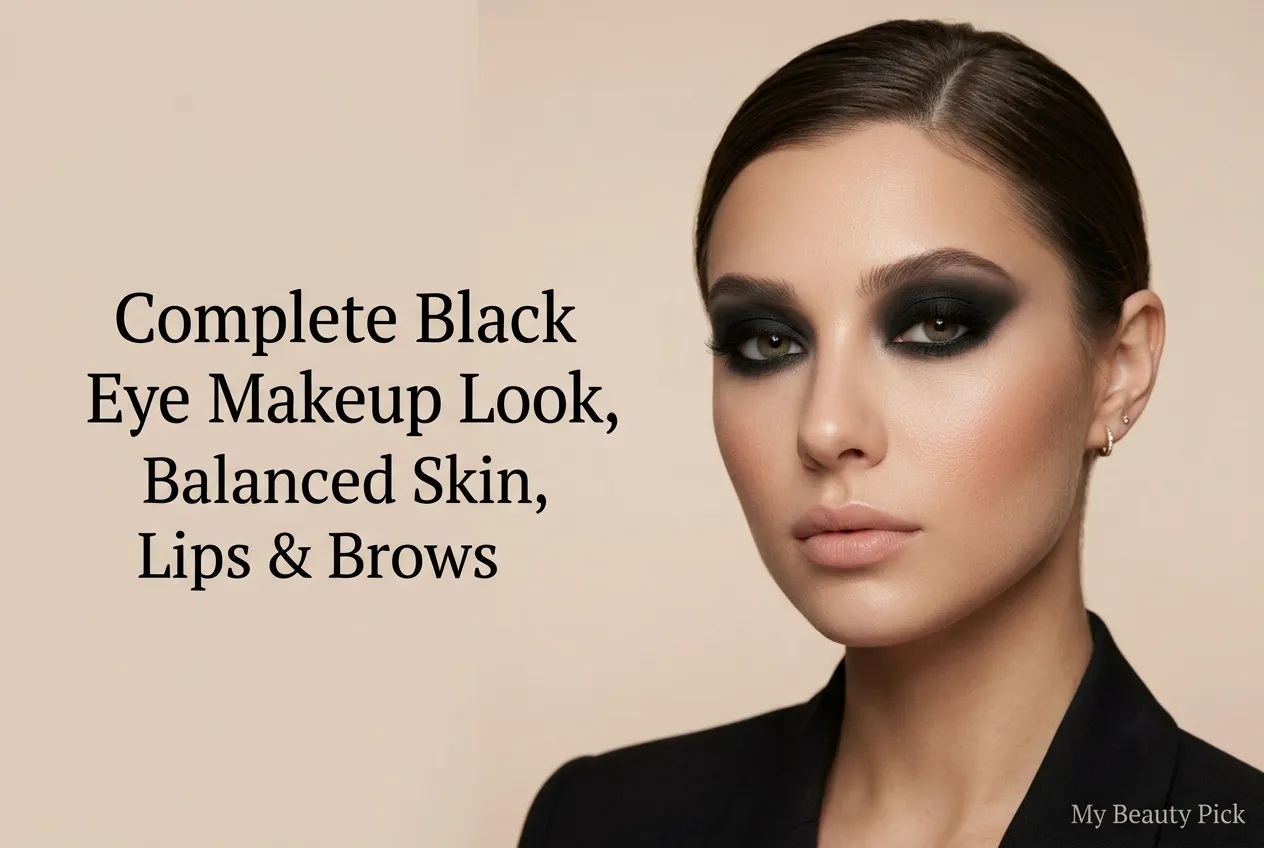
Face Makeup That Complements Black Eye Makeup
Black eye makeup does most of the work in a look — the face and lip makeup around it should support rather than compete. A few principles:
- Lip colour: nude or natural lip is the most common pairing — it lets the eye be the focal point. A deep berry, burgundy, or plum is the dramatic alternative for a full glam or gothic look. Red works on some but can read as conflicting rather than complementary if both the eye and lip are equally intense.
- Blush and bronzer: keep them subtle. A soft bronzer through the hollows and a light blush on the cheeks provides dimension without competing with the eye. Very heavy contouring alongside a full black eye can look overdone.
- Base: a polished skin-like foundation or tinted moisturiser (depending on the overall intensity of the look) rather than heavy full-coverage. On tan skin, a slightly luminous base enhances the contrast with the dark shadow.
- Brows: defined brows matter more alongside black eye makeup than in softer looks — the brow gives structure to the eye area that black shadow intensifies. Well-defined, not overly heavy.
Frequently Asked Questions
How do you apply black eyeshadow?
Apply a matte transition shade (taupe or mid-brown) in the crease first to create a blending buffer, then pack black eyeshadow onto the lid and outer corner with a flat shader brush using pressing rather than sweeping motions. Blend the edges with a clean fluffy brush. Black applied directly without a transition shade is harder to blend because the colour contrast between skin and black is too extreme to soften with blending alone.
How do you blend black eyeshadow without looking messy?
The transition shade is the solution. Apply a mid-toned matte shade (taupe, warm brown, or grey) in the crease before any black eyeshadow — this gives the black a gradient to blend into rather than a hard contrast with bare skin. Blend with a clean fluffy brush in windshield-wiper motions at the crease boundary and circular motions where the black meets the transition shade.
How do you do a black smoky eye?
Apply eye primer, then a matte taupe or grey transition shade in the crease. Pack black eyeshadow onto the lid and outer third. Blend where the black meets the transition shade. Line the upper lash line with black gel liner and blend it upward into the shadow. Smoke out the lower lash line with a small brush and black shadow. Apply mascara or false lashes. The intensity depends on how far above the crease you take the black and how many layers you build.
How do you prevent black eyeshadow fallout?
Do eye makeup before foundation. Hold a tissue shield under the eye when packing black on the lid. Tap excess powder off the brush before each application. Mist the shader brush with setting spray before picking up black eyeshadow — slightly damp brushes deposit more precisely with less fallout. Clean remaining fallout with a dry cotton swab before applying foundation.
Is black eyeshadow hard to use?
The difficulty is almost entirely about blending — specifically softening a very dark colour into surrounding skin. The transition shade technique solves most of this: by placing a medium-toned matte shade in the crease and outer corner first, the black has something to blend into rather than a stark contrast with bare skin. With this approach, black eyeshadow is manageable for beginners.
Can beginners use black eyeshadow?
Yes — starting with a grey or charcoal in the crease first, then adding black to the outer corner only rather than the full lid, gives a result that’s more forgiving than a full-lid black look. As blending technique improves, the black can extend further across the lid. Eye primer and a transition shade remove most of the difficulty.
Should eyeliner go on before or after eyeshadow?
After. Applying eyeshadow after liner disturbs the liner and smudges it unevenly into the shadow. Apply primer, transition shade, then eyeshadow — once shadow is blended and set, apply gel or pencil liner on the upper lash line, then use a small brush to blend the liner edge upward into the shadow for a seamless join.
How do you make black eye makeup last longer?
Eye primer is the single most effective step — it prevents creasing and fading throughout the day. Apply primer, let it set for 30 seconds, then apply shadow. Setting spray misted over the finished eye locks all layers. Gel liner lasts significantly longer than pencil. For waterline liner, pressing black eyeshadow over the pencil with a small brush sets it and extends how long it holds.